> ## Documentation Index
> Fetch the complete documentation index at: https://docs.hivenet.com/llms.txt
> Use this file to discover all available pages before exploring further.
# Launch and connect to your first Compute instance
> Step-by-step instructions to create your account, deploy your first instance, and connect via SSH.
This article will walk you through the basics of Compute, Hivenet's GPU-powered cloud service built for AI, ML, and other high-performance workloads.
You'll learn how to create an account, launch your first instance, connect to it, and manage your usage.
## **What you’ll need**
* A Compute account
* An SSH key (public) to connect to your instance
* Optional: a payment method to add credits later
## **Create your account**
To get started:
1. [Sign up for Compute](https://auth.compute.hivenet.com/u/login?state=hKFo2SA2TU1QNHZhNk9kM3lTX2FCMi1yMW5OaWJZZlFpUDZvOaFur3VuaXZlcnNhbC1sb2dpbqN0aWTZIHM5QjI1Uk1ZQTdPSlBEbm9kZEVTcUtWR3ZyMTRIQV8to2NpZNkgYnhOQ09YRXJ4R2VDNTJMSXdxQ25pSllQQWdSd3lyc3U).
2. Log in to access your dashboard.
Your dashboard is where you'll manage your projects, launch instances, and track usage.
 Compute uses a separate account from the one you may already have for Hivenet storage and other services. We know that’s not ideal, and we’re actively working on unifying accounts across the platform.
## **Launch an instance**
Once you’re in the dashboard:
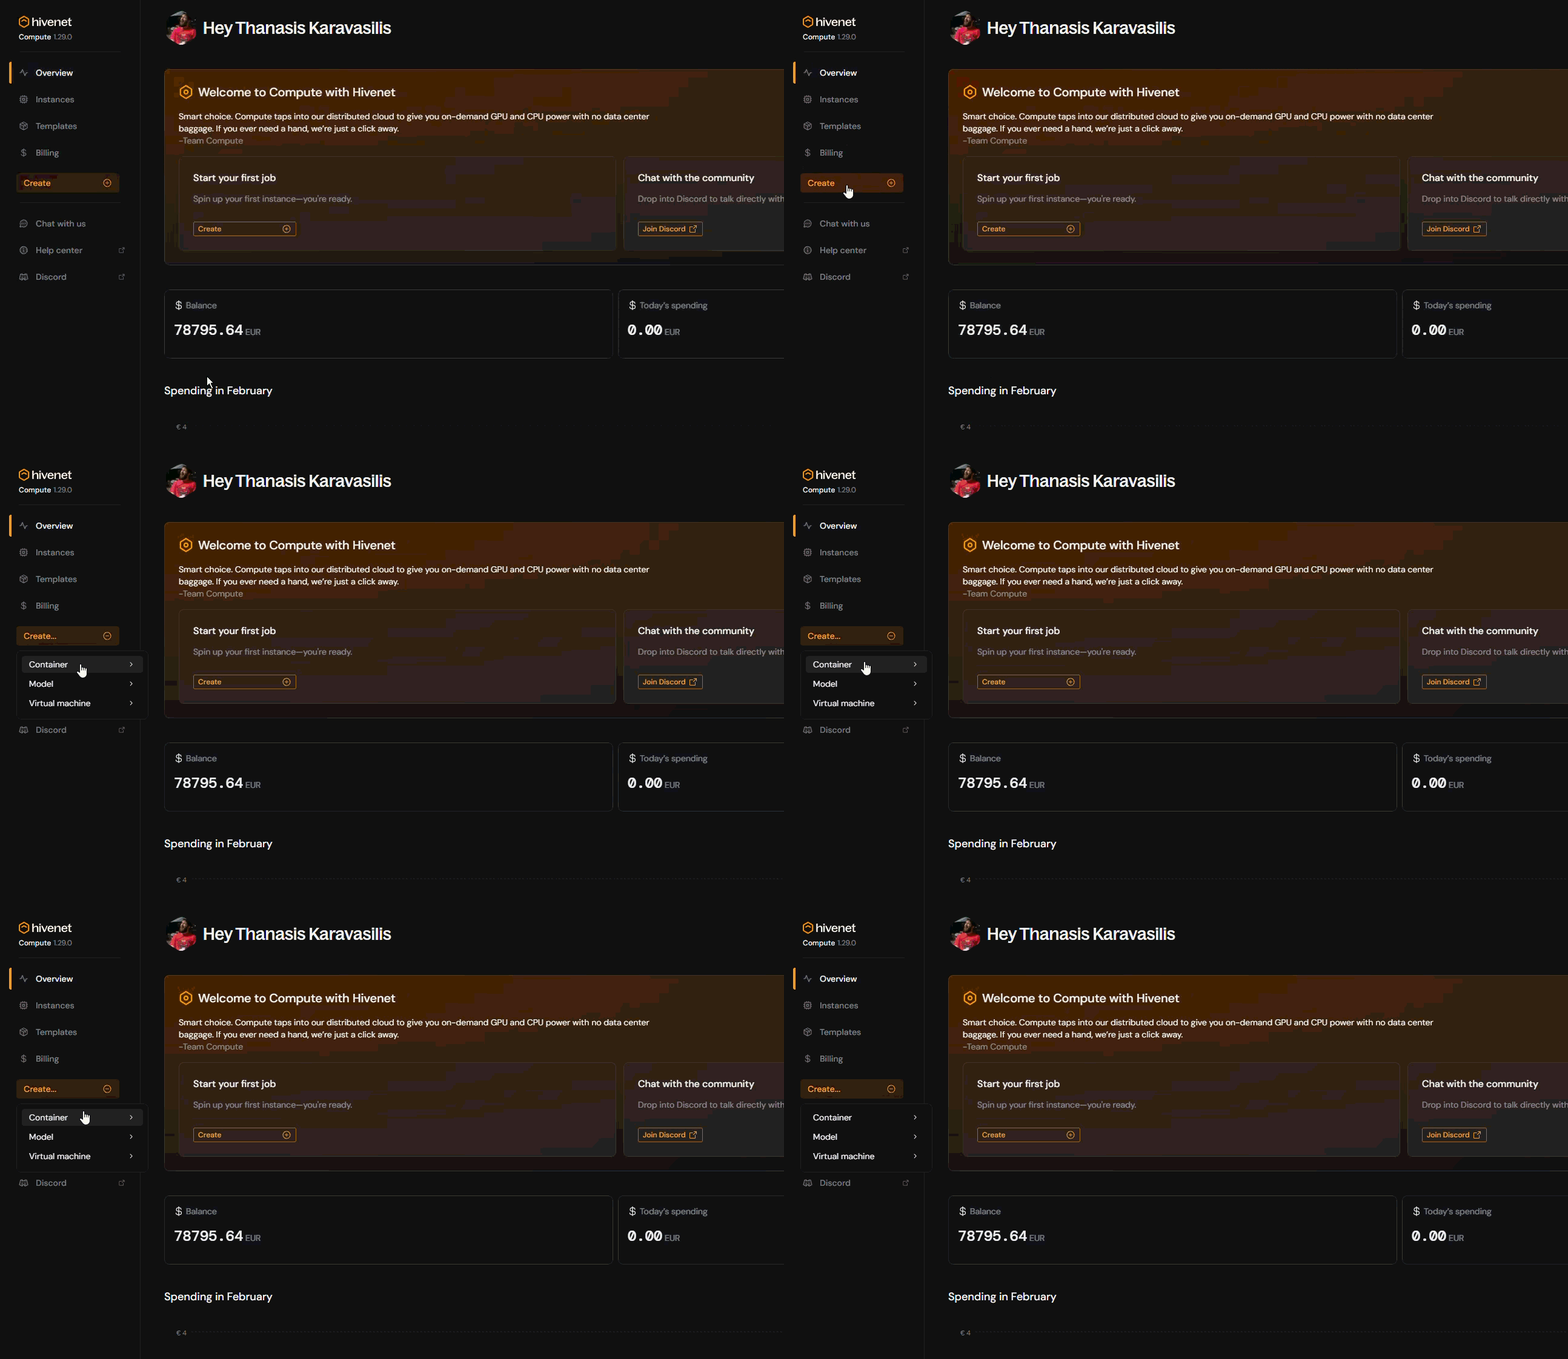
* Click on **Create**.
* Choose what you want to launch, a \*\*Container \*\*or a **Virtual machine**.
Compute uses a separate account from the one you may already have for Hivenet storage and other services. We know that’s not ideal, and we’re actively working on unifying accounts across the platform.
## **Launch an instance**
Once you’re in the dashboard:
* Click on **Create**.
* Choose what you want to launch, a \*\*Container \*\*or a **Virtual machine**.
 * **Choose a** **location**.
* Under **Choose your setup**, select your instance type (GPU or vCPU).
* Choose a **Size** (Small, Medium, Large).
* **Pick a template** (container) or **Pick an OS** (virtual machine).
* Go through the **Connectivity** options and upload your **SSH key**.
* Click on **Create container** or **Create virtual machine**.
Your instance will now appear on the **Instances** page with its current status.
Root access is disabled on containers. Use a Custom Template for system packages.
## **Connect to your instance via SSH**
After launching, here’s how to connect:
* On the **Instances** page, find your running instance.
* Click **Connectivity options**.
* Copy the provided SSH command.
* Paste it into your terminal to connect.
You can configure your `~/.ssh/config` file for faster access later.
## **Stop or terminate an instance**
To avoid using up credits, stop any instances you’re not actively using.
* **Stop**: Pauses your instance (you can restart it later).
* **Terminate**: Permanently deletes your instance and all data on it.
Terminating an instance will erase everything on it. Be sure to back up any important files first.
## **Add credits to your balance (optional)**
To add credits to your account, follow these steps:
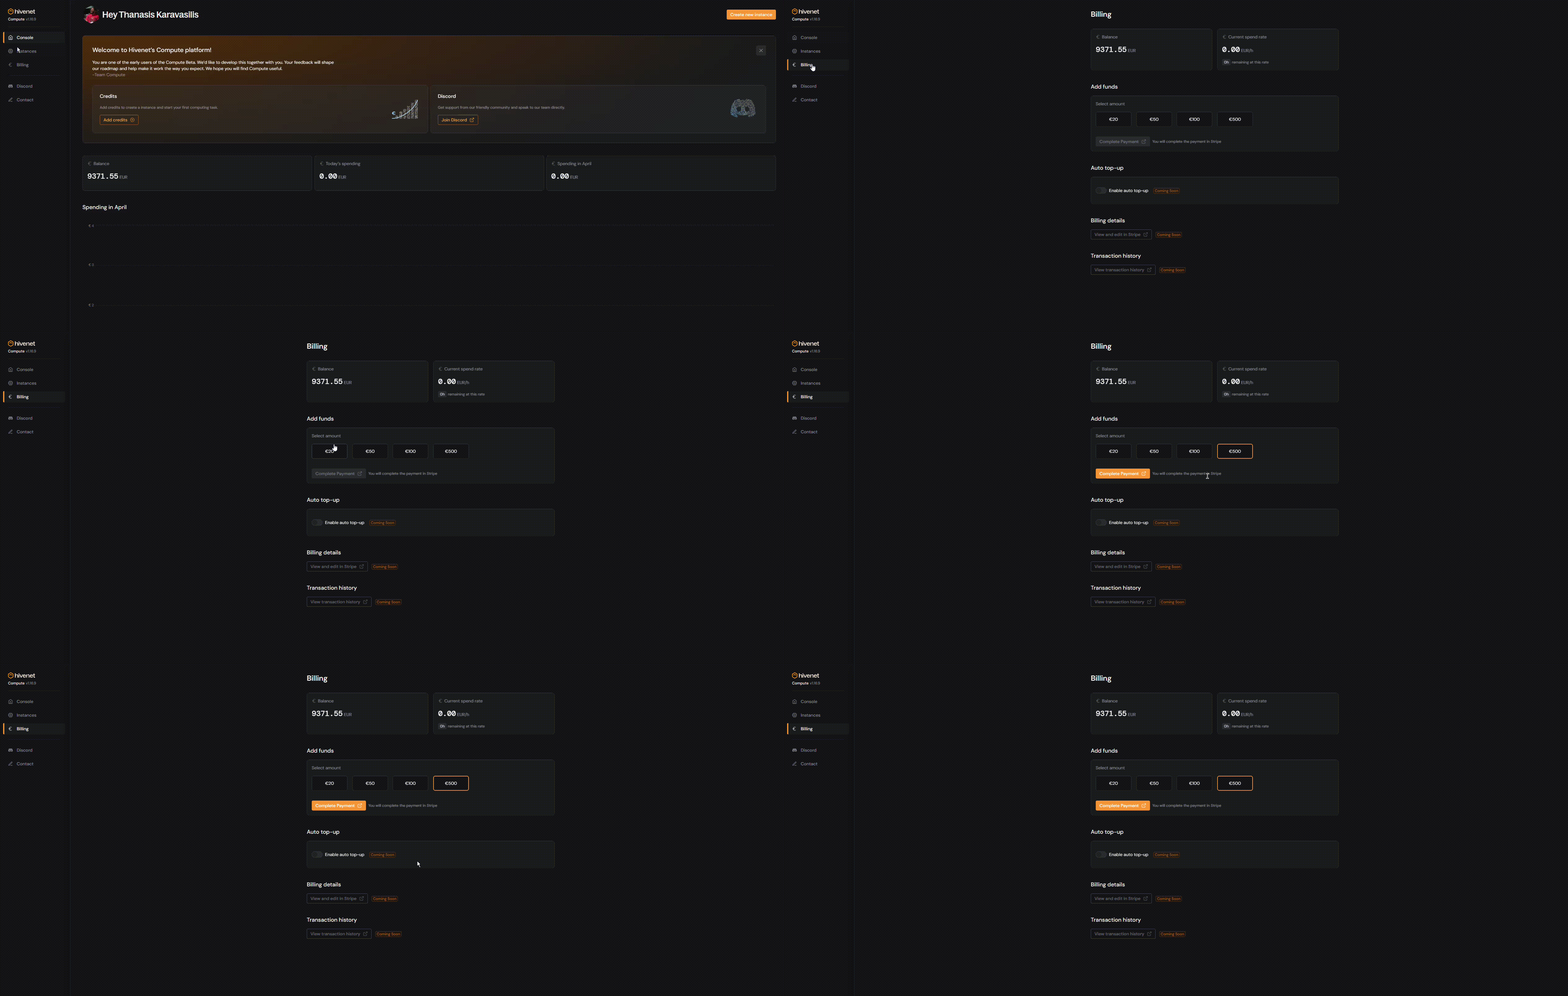
* Open the **Billing** page from the left-hand menu.
* Click **Add credits**.
* Choose an amount and complete the Stripe checkout flow.
* **Choose a** **location**.
* Under **Choose your setup**, select your instance type (GPU or vCPU).
* Choose a **Size** (Small, Medium, Large).
* **Pick a template** (container) or **Pick an OS** (virtual machine).
* Go through the **Connectivity** options and upload your **SSH key**.
* Click on **Create container** or **Create virtual machine**.
Your instance will now appear on the **Instances** page with its current status.
Root access is disabled on containers. Use a Custom Template for system packages.
## **Connect to your instance via SSH**
After launching, here’s how to connect:
* On the **Instances** page, find your running instance.
* Click **Connectivity options**.
* Copy the provided SSH command.
* Paste it into your terminal to connect.
You can configure your `~/.ssh/config` file for faster access later.
## **Stop or terminate an instance**
To avoid using up credits, stop any instances you’re not actively using.
* **Stop**: Pauses your instance (you can restart it later).
* **Terminate**: Permanently deletes your instance and all data on it.
Terminating an instance will erase everything on it. Be sure to back up any important files first.
## **Add credits to your balance (optional)**
To add credits to your account, follow these steps:
* Open the **Billing** page from the left-hand menu.
* Click **Add credits**.
* Choose an amount and complete the Stripe checkout flow.
 Need more help? Check our [Pricing](https://compute.hivenet.com/#pricing) or visit the [FAQ](/documentation/reference/faq).
## **What’s next?**
Now that you’re set up, you can start running AI models, experimenting with machine learning, or deploying custom workloads—**on demand and on your terms.**
## See also
* [Choosing between GPU and vCPU instances](/tutorials/more-guides/choosing-between-cpu-gpu)
* [Using vCPUs in Compute with Hivenet](/documentation/essentials/how-to-vcpu)
Need more help? Check our [Pricing](https://compute.hivenet.com/#pricing) or visit the [FAQ](/documentation/reference/faq).
## **What’s next?**
Now that you’re set up, you can start running AI models, experimenting with machine learning, or deploying custom workloads—**on demand and on your terms.**
## See also
* [Choosing between GPU and vCPU instances](/tutorials/more-guides/choosing-between-cpu-gpu)
* [Using vCPUs in Compute with Hivenet](/documentation/essentials/how-to-vcpu)